When you’ve set up your Consent Management Platform (CMP) and integrated Google Consent Mode v2, we always recommend you verify that it’s done so correctly.
If you’re not sure how, this article is for you.
There are a number of different ways to implement Consent Mode v2:
- Consent Mode v2 implementation guide for WordPress
- Consent Mode v2 implementation guide for Google Tag Manager
- Consent Mode v2 implementation guide for Shopify
- Consent Mode v2 implementation guide via script
No matter what method you prefer or platforms you use, you’ll need a Consent Management Platform. So, in case you don’t already have one, why not try Cookie Information? You can always get a free 14-day trial, no credit card needed.
When you’ve set up your Consent Management Platform and Consent Mode v2, there are three methods for verifying that everything is working as intended:
- Our Consent Mode v2 scanner
- The browser-way
- The Google Tag Assistant way.
Let’s dive into them, one by one.
Watch the webinar:
How to verify Consent Mode v2 with our scanner tool
It doesn’t get simpler than this.
At Cookie Information we’ve developed a scanner tool — similar to our Compliance Check — that scans your website to check if you have implemented the right scripts and links.
It’s completely free to use, and gives you a quick overview. Click the button below and start scanning your website.
We do, however, always recommend that you verify your implementation manually. Because our scanner tool does not guarantee 100% accuracy, and might not be able to verify certain atypical Consent Mode v2 implementations.
Speaking of manual checks, let’s walk you through the next method.
How to verify Consent Mode v2 in your browser
This is the most straightforward way to check if Consent Mode v2 is working on your website. But it does not have to be your website. You can check someone else’s website as well with this method.
I call it the “source code way” because it makes me sound tech-savvy. But it is just about inspecting the website in any old browser.
- First, open your browser and clear your cache.
- Open up your website in incognito.
- Do not click on the cookie banner.
- Right-click on your page and choose Inspect.
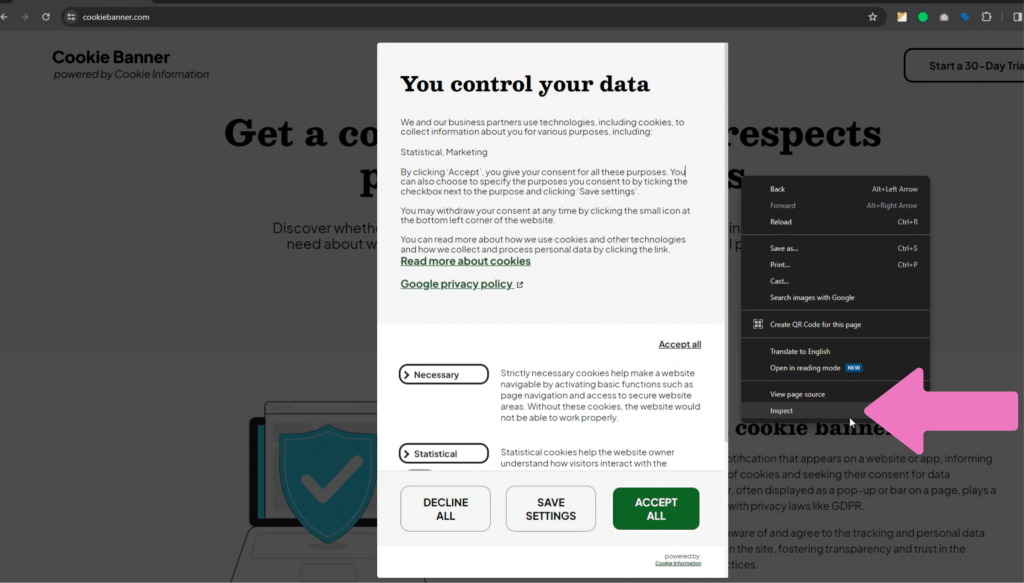
- Go to the Console tab
- Type datalayer in the search bar and press enter.
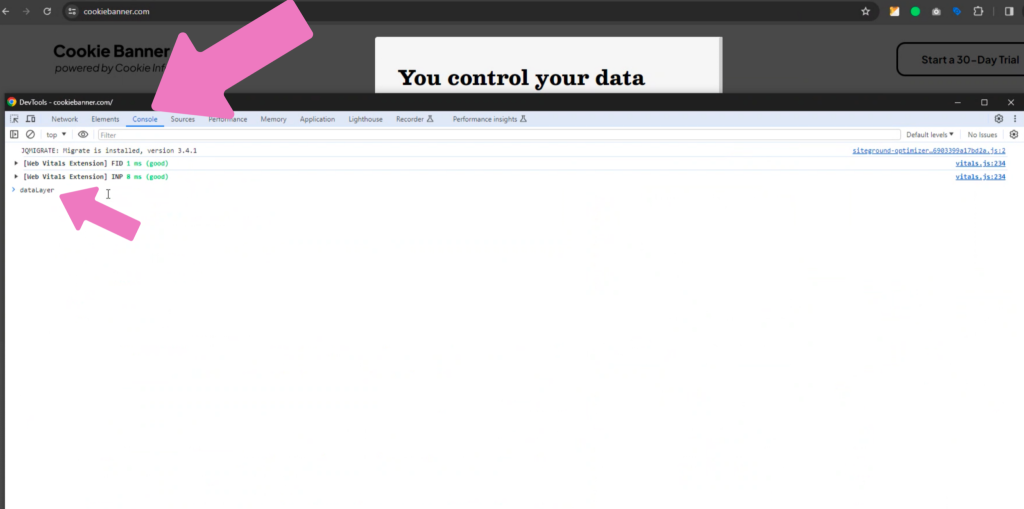
Do you see the events?
Look for the text (an event) called 0: consent. Now look below. You should also see events called ad_ personalization, ad _storage and so on.
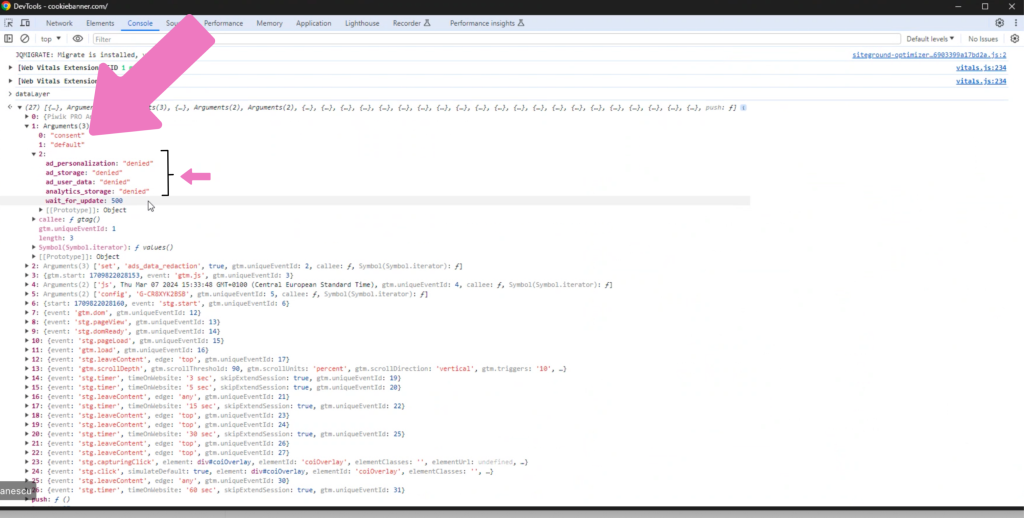
Notice that there are numbers for the events on the left. Every time you change something, like go back and say yes to cookies, a new event comes up.
When inspecting consent like this, always pick the last consent event to see the actual state of things.
Now, let’s test what happens when we say no to cookies.
- Return to your website window and click accept all cookies on your cookie banner.
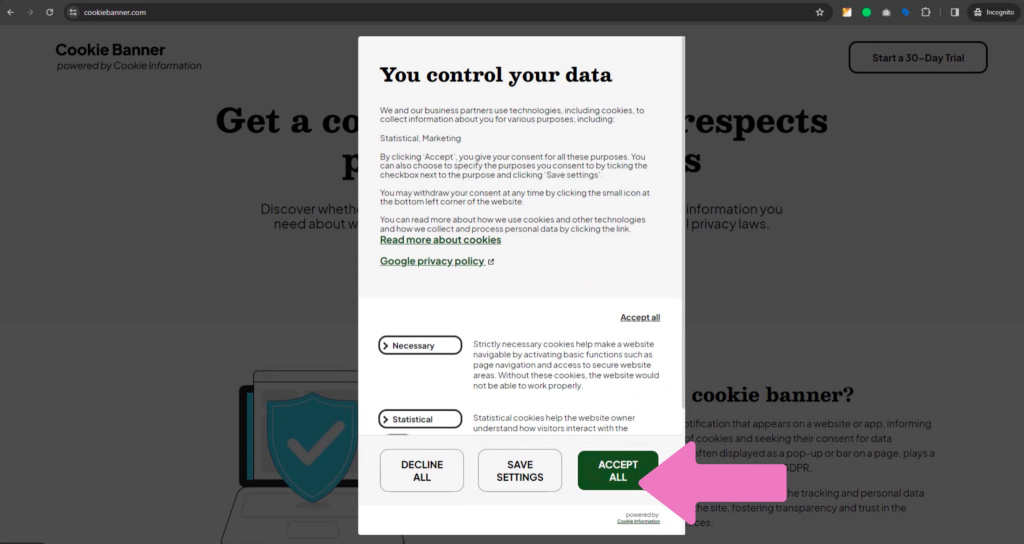
Now go back, type in datalayer again, and choose the latest consent state. All the parameters should be set to granted.
Congratulations! You have successfully implemented Consent Mode v2

Now, let’s look at another way to verify if Consent Mode v2 is working.
How to verify Consent Mode v2 in Google Tag Assistant?
If Google was a Doctor, and you needed to give your Consent Mode v2 a check-up, where would you go?
To Google’s Tag Assistant, of course.
I’m assuming you’ve implemented Consent Mode v2 via Cookie Information’s tag template, so checking the your set up is relatively easy.
Using a Tag Template means picking a Consent Mode v2 template from Google’s Tag Gallery and adding it to your workspace. This is one of the many perks of using a Google-certified CMP platform like Cookie Information.
So, you’ve implemented Consent Mode v2 by adding our template, and you’re in the Google Tag Manager (GTM) workspace.
- Go to the Preview Mode section, which you can access in the top-right corner when viewing your tags.
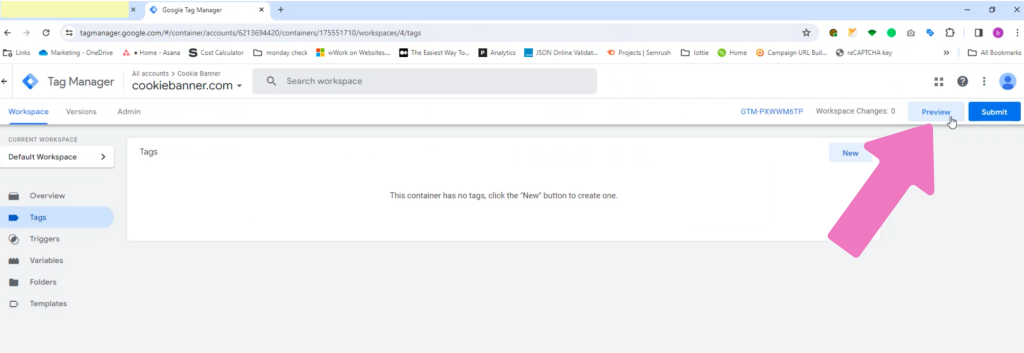
- When pushing preview, you will get into Google Tag Assistant. Enter your domain name and click connect.
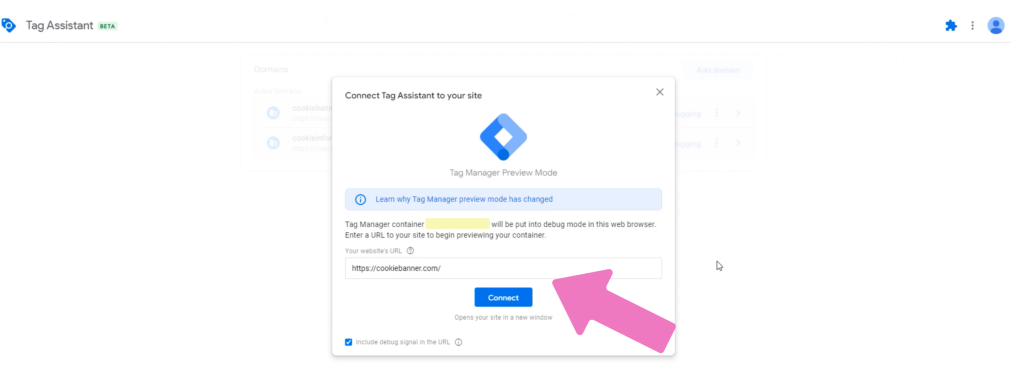
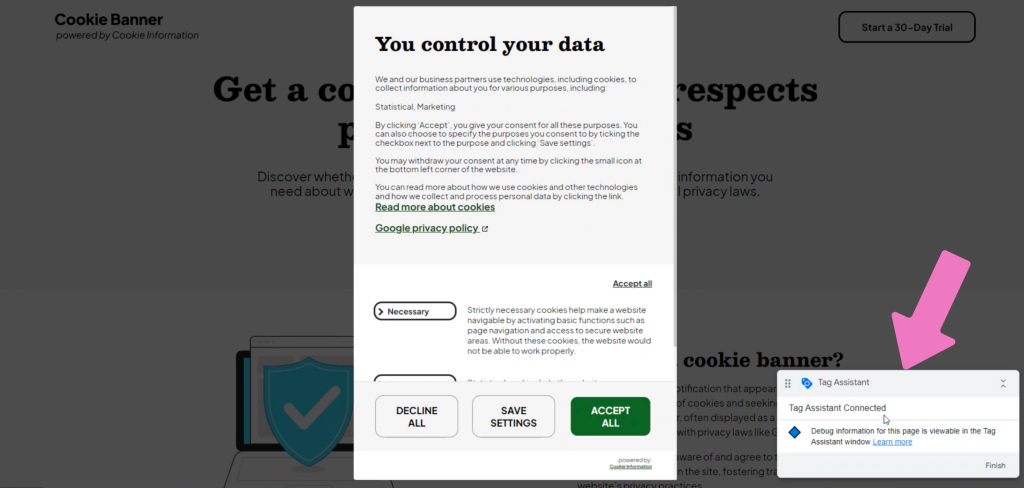
- Your website will open with a popup that tells you it is connected to Google Tag Assistant. Make sure you clear the cache and cookies in this window.
- Do not touch the cookie-banner popup!
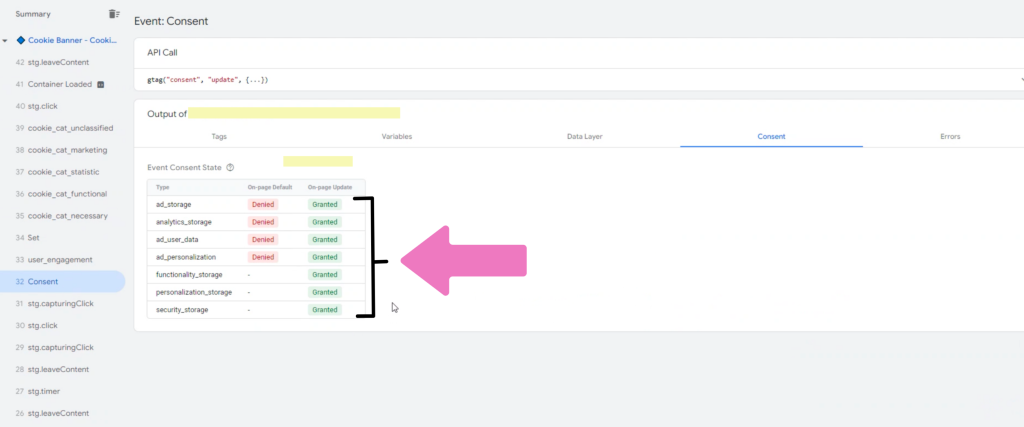
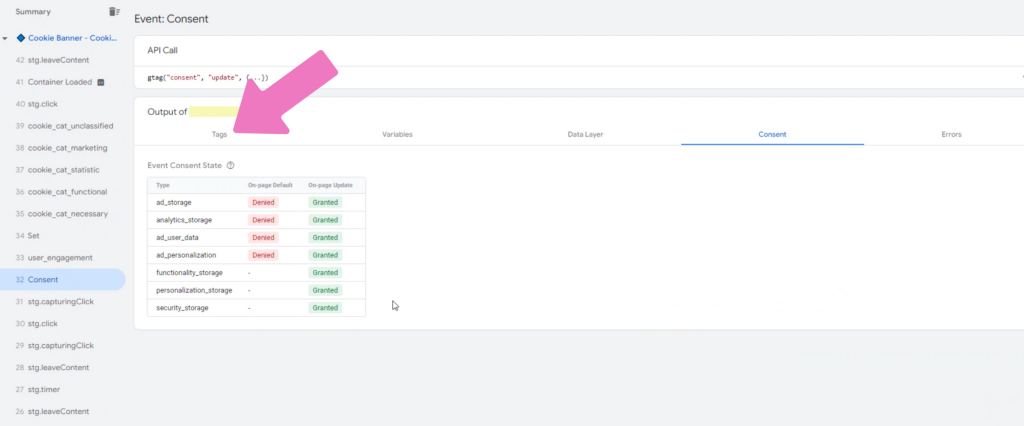
- Return to the GTM Tag Assistant page and ensure you are under the Consent tab.
- All the consent types should be set to denied.
- Return to your website and accept all cookies before returning to the GTM Tag Assistant page. Can you spot the difference? There is now a new consent event in the panel where all consent types should be granted and green.
Congratulations for making it this far. And for successfully ensuring that your Consent Mode v2 is working.
- You can go back and forth like this, changing what you accept on your cookie banner. Perhaps you are ok with statistical cookies but not marketing. Then, each consent state will be adjusted accordingly.
Take note:
You can also view the tags tab to see if your tags, in general, are working in sync with the cookie categories* that your visitors are accepting or denying.
*functional, statistical, marketing
But for this to work, first make sure you have implemented the so-called “SDK” in the GTM Cookie Control. SDK is short for Software Development Kit. Read more about how to set up the SDK here.
Ok, that’s it.
Happy Consent Mode-ing!